Building and Installing Linux Kernel from the Source Code in an Existing Linux OS
Building Linux kernel may sound a complex and geek-only thing. However, as Linux kernel itself has much less depended tools/packages compared to other software packages, it is quite easy to compile, build and install a Linux kernel from the source code in an existing Linux OS. Building Linux kernel is needed if you need to build a specific Linux kernel or update your drivers for a kernel by yourself. This post will go through the steps for compiling and installing Linux kernel. In this post, we will use the example of building kernel 4.10.1 on CentOS 7.

Download the source code of Linux kernel
Download a release from kernel.org.
For the example, we download the 4.10.1 kernel:
# wget https://www.kernel.org/pub/linux/kernel/v4.x/linux-4.10.1.tar.gzAfter downloading, unpack the source code and change the working directory to the unpacked directory:
# tar xf linux-4.10.1.tar.gz
# cd linux-4.10.1/
Install needed tools
You need to install the tools needed depending on the default packages installed on your system.
Here are some common ones as follows. If it is reported more are needed/missing, you may install them accordingly.
# yum install gcc make ncurses-devel openssl-develPrepare a config file
To compile Linux kernel, a .config file under the top directory is needed. Configuring the Linux kernel from scratch will be quite time consuming and require quite good understanding of the kernel componenets. However, things are not that complex as we can re-use existing configuration files that are usually installed together with existing kernel.
You can find some config files for kernels already installed. On Fedora/RHEL/CentOS, you can find some in /boot/
# ls /boot/config-*Such as
# ls /boot/config-4.*
/boot/config-3.10.0-514.6.1.el7.x86_64  /boot/config-3.18.41-20.el7.x86_64
Pickup one that is closing to the kernel version you are compiling and copy the config to .config:
# cp /boot/config-3.18.41-20.el7.x86_64 .configThen run the config tool to make it a good one for the version of Linux kernel you are building:
# make menuconfigIt will several tools:
  HOSTCC  scripts/basic/fixdep
  HOSTCC  scripts/kconfig/mconf.o
  SHIPPED scripts/kconfig/zconf.tab.c
  SHIPPED scripts/kconfig/zconf.lex.c
  SHIPPED scripts/kconfig/zconf.hash.c
  HOSTCC  scripts/kconfig/zconf.tab.o
  HOSTCC  scripts/kconfig/lxdialog/checklist.o
  HOSTCC  scripts/kconfig/lxdialog/util.o
  HOSTCC  scripts/kconfig/lxdialog/inputbox.o
  HOSTCC  scripts/kconfig/lxdialog/textbox.o
  HOSTCC  scripts/kconfig/lxdialog/yesno.o
  HOSTCC  scripts/kconfig/lxdialog/menubox.o
  HOSTLD  scripts/kconfig/mconf
scripts/kconfig/mconf  Kconfig
And a tool like the following one will appear:
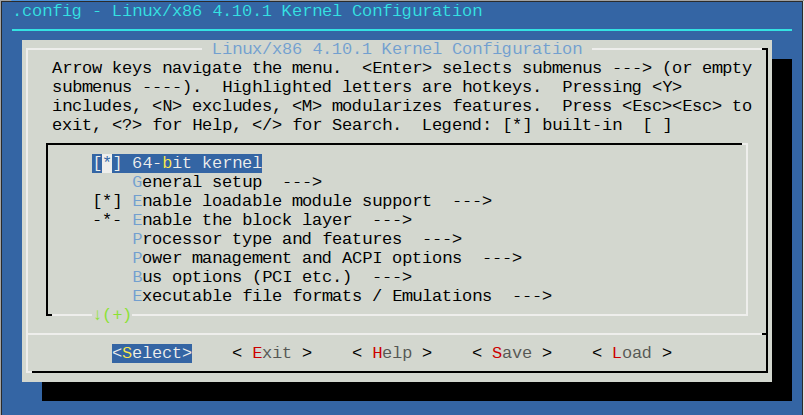
You do not need to configure anything by default unless you need to configure the kernel specifically like adding/removing drivers/features.
Select “< Exit >” and hit entry, it will ask whether you would like to save your new configuration for the kernel like:
┌──────────────────────────────────────────────────────────┐
│  Do you wish to save your new configuration?             │
│  (Press <ESC><ESC> to continue kernel configuration.)    │
├──────────────────────────────────────────────────────────┤
│                   < Yes >      <  No  >                  │
Choose “< Yes >” and it will save a new configuration file in .config:
.config:444:warning: symbol value 'm' invalid for MICROCODE
.config:618:warning: symbol value 'm' invalid for CPU_FREQ_STAT
.config:866:warning: symbol value 'm' invalid for NF_CT_PROTO_DCCP
.config:868:warning: symbol value 'm' invalid for NF_CT_PROTO_SCTP
.config:869:warning: symbol value 'm' invalid for NF_CT_PROTO_UDPLITE
.config:887:warning: symbol value 'm' invalid for NF_NAT_PROTO_DCCP
.config:888:warning: symbol value 'm' invalid for NF_NAT_PROTO_UDPLITE
.config:889:warning: symbol value 'm' invalid for NF_NAT_PROTO_SCTP
.config:3258:warning: symbol value 'm' invalid for SERIAL_8250_FINTEK
.config:5262:warning: symbol value 'm' invalid for USB_ISP1760_HCD
configuration written to .config

*** End of the configuration.
*** Execute 'make' to start the build or try 'make help'.
Build the kernel and install it
Now the kernel is configured and you can build and install it by command:
# make -j `nproc` && make modules_install && make installThe first make command compile the source code files. The -j option make make compile in parallel using concurrent tasks of at most number of the processors in the system so that the compilation can be much faster. The make moduels_install one installs the modules and make install install the kernel.
If everything works well, you will have the new kernel installed in your system after you seeing message like
...
  INSTALL /lib/firmware/mts_cdma.fw
  INSTALL /lib/firmware/mts_gsm.fw
  INSTALL /lib/firmware/mts_edge.fw
  INSTALL /lib/firmware/edgeport/boot.fw
  INSTALL /lib/firmware/edgeport/boot2.fw
  INSTALL /lib/firmware/edgeport/down.fw
  INSTALL /lib/firmware/edgeport/down2.fw
  INSTALL /lib/firmware/edgeport/down3.bin
  INSTALL /lib/firmware/whiteheat_loader.fw
  INSTALL /lib/firmware/whiteheat.fw
  INSTALL /lib/firmware/keyspan_pda/keyspan_pda.fw
  INSTALL /lib/firmware/keyspan_pda/xircom_pgs.fw
  INSTALL /lib/firmware/cpia2/stv0672_vp4.bin
  INSTALL /lib/firmware/yam/1200.bin
  INSTALL /lib/firmware/yam/9600.bin
  DEPMOD  4.10.1
sh ./arch/x86/boot/install.sh 4.10.1 arch/x86/boot/bzImage \
        System.map "/boot"
Then you can reboot you Linux OS and choose the new kernel in grub/grub2 entries to use the new Linux kernel. If it is not the default entry, you may use the grub2-select tool to change the default grub2 boot entry. Enjoy!