Push and Pull data from Restful Service in Asp.net MVC Application using Angular JS
In this post, asp.net development India based professionals will explain the best way to manage the Restful service using AngularJS. They are explaining the push and pull functionality available in Rest service in simple steps. Read the article to know more.
In this Post I am going explain how we can manage the Restful service using AngularJS. Push and Pull functionality of Rest service Json data in MVC View in easy steps.

Most of the Pull and Push Services will be happened in Serve side. Each server round trips the user has to wait until unless the data will be loaded in the UI. To avoid this we can use the client side scripting like AngularJS.
AngularJS is the JavaScript framework. It is a structural framework which make use of Html as a template language and make you application is dynamic.
We are going touch the below points in this Article.
1. Adding AngularJS scripts from NuGet Packages
2. Creating JSon Service through Entity Framework
3. Reading JSon Rest Service and Displayed in MVC View
4. Implementing Paging in AngularJS
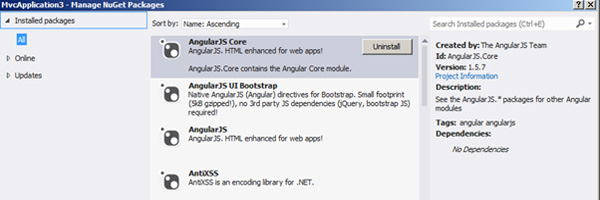
Adding AngularJS Script files
First we need to add the AngularJS reference scripts from Visual Studio through Mange NuGet Packages.
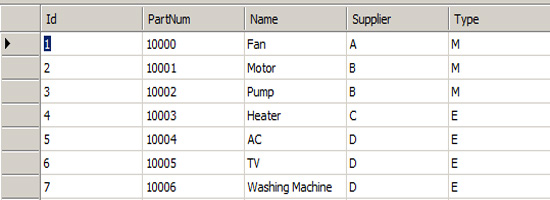
Create Table and fill data for Rest service.
Create PartMaster table using below SQL script.
CREATE TABLE [dbo].[PartMaster] (
[Id] INT NOT NULL,
[PartNum] NVARCHAR (50) NULL,
[Name] NVARCHAR (MAX) NULL,
[Supplier] NVARCHAR (50) NULL,
[Type] NCHAR (10) NULL,
PRIMARY KEY CLUSTERED ([Id] ASC)
);
Fill the bellow data in PartMaster table.
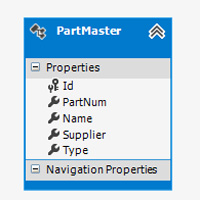
Create the Entity data model for the above Table.
Create MVC controller PartJsonController class under App_Start folder. Copy and paste the below code in Controller class.
using System;
using System.Collections.Generic;
using System.Linq;
using System.Web;
using System.Web.Mvc;
namespace MvcApplication3.App_Start
{
public class PartJsonController : Controller
{
//
// GET: /PartJson/
public ActionResult Index()
{
return View();
}
public JsonResult GetParts()
{
Entities2 PartEntity = new Entities2();
var result = PartEntity.PartMasters.ToList();
return Json(result, JsonRequestBehavior.AllowGet);
}
}
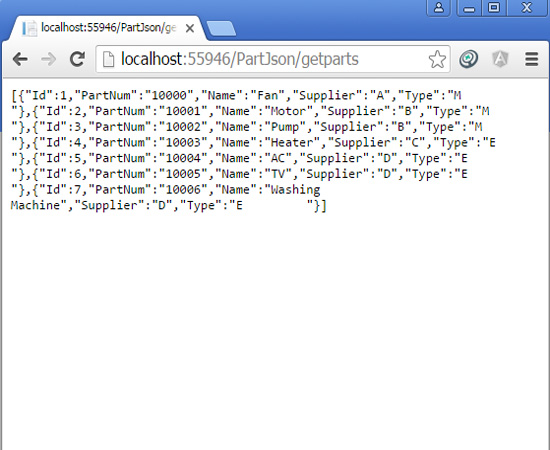
}GetParts method will read the data from Entity and return JSon Data. Right click on the method and create a New MVC View page using Add View context menu.
The output of Rest service as shown below.
Create JavaScript file “ShowParts.JS” under Script folder.
Copy the below code and paste in ShowPart JS file.
var PartModule = angular.module('PartMaintenace', ['ui.bootstrap', 'ngResource']);
PartModule.controller('PartController', function ($scope, getpartSvc) {
$scope.reverse = true;
$scope.predicate = 'name';
$scope.currentPage = 1;
$scope.totalItems = 0;
$scope.numPerPage = 0;
$scope.order = function (predicate) {
$scope.reverse = ($scope.predicate === predicate) ? !$scope.reverse : false;
$scope.predicate = predicate;
};
GetPartInfos();
function GetPartInfos() {

getpartSvc.GetPartInfos()
.success(function (parts) {

$scope.GetParts = parts;

$scope.totalItems = $scope.GetParts.length;
$scope.numPerPage =5;
$scope.paginate = function (value) {
var begin, end, index;
begin = ($scope.currentPage - 1) * $scope.numPerPage;
end = begin + $scope.numPerPage;
index = $scope.GetParts.indexOf(value);
return (begin <= index && index < end);
};
console.log($scope.parts);
})
.error(function (error) {
$scope.status = error.message;
console.log($scope.status);
});

}

});

PartModule.factory('getpartSvc', ['$http', function ($http) {

var GetpartSvc = {};
GetpartSvc.GetPartInfos = function () {
return $http.get('/PartJson/getparts');
};

return GetpartSvc;

}]);
The bellow portion is used for read the JSon data from Rest service “getParts”.
PartModule.factory('getpartSvc', ['$http', function ($http) {

var GetpartSvc = {};
GetpartSvc.GetPartInfos = function () {
return $http.get('/PartJson/getparts');
};

return GetpartSvc;

}]);
Next we have to create the new MVC View to display the Restful service data.
Refer the above Script file for fetching the Rest service data and also refer the AngularJS and Bootstrap css file in Script section of MVC View.
@section scripts{
<script src=”~/Scripts/angular.js”></script>
<link rel=”stylesheet” href=”~/Scripts/bootstrap.min.css”>

<script src=”~/Scripts/angular-ui/ui-bootstrap-tpls.js”></script>

<script src=”~/Scripts/angular-resource.js”></script>
<script src=”~/Scripts/ShowParts.js”></script>

}
Copy the below code and Paste on your Index View Page under Views/PartJson
@{
ViewBag.Title = “Index”;
}
<h2>Index</h2>
@section scripts{
<script src=”~/Scripts/angular.js”></script>
<link rel=”stylesheet” href=”~/Scripts/bootstrap.min.css”>
<script src=”~/Scripts/angular-ui/ui-bootstrap-tpls.js”></script>
<script src=”~/Scripts/angular-resource.js”></script>
<script src=”~/Scripts/ShowParts.js”></script>
}
<div>
<style>
.odd {
background-color:palegreen;
color: #008b8b;
}
td th {
height: 30px;
min-width: 100px;
}
thead {
background-color:aqua;
color: white;
height: 30px;
}
</style>
</div>
<div ng-app=”PartMaintenace” >
<br/>
<br/>
@*<input type=”text” placeholder=”Part Search” ng-model=”PartSearch” />*@
<br />
<div ng-controller=”PartController” class=”container-fluid”>
<table class=”table table-striped” >
<thead>
<tr>
<th></th>
<th>
<a href=”” ng-click=”order(‘Id’)”>ID</a>
</th>
<th><a href=”” ng-click=”order(‘PartNum’)”> PartNum</a> </th>
<th><a href=”” ng-click=”order(‘Name’)”>Name</a> </th>
<th><a href=”” ng-click=”order(‘Supplier’)”>Supplier</a> </th>
<th><a href=”” ng-click=”order(‘Type’)”>Type</a> </th>
</tr>
</thead>
<tbody>
<tr>
<td>Search Filter =>></td>
<td > <input style=”width:100px;height:25px” type=”text” ng-model=”PartSearch.Id” /></td>
<td> <input style=”width:100px;height:25px” type=”text” ng-model=”PartSearch.PartNum” /> </td>
<td><input style=”width:100px;height:25px” type=”text” ng-model=”PartSearch.Name” /> </td>
<td><input style=”width:100px;height:25px” type=”text” ng-model=”PartSearch.Supplier” /> </td>
<td><input style=”width:100px;height:25px” type=”text” ng-model=”PartSearch.Type” /> </td>
</tr>
<tr ng-repeat=”p in GetParts| orderBy:predicate:reverse | filter:paginate | filter : PartSearch” ng-class-odd=”‘odd'”>
<td></td>
<td>{{p.Id}}</td>
<td>{{p.PartNum}}</td>
<td>{{p.Name}}</td>
<td>{{p.Supplier}}</td>
<td>{{p.Type}}</td>
</tr>
</tbody>
</table>
<pagination total-items=”totalItems” ng-model=”currentPage”
max-size=”1″ boundary-links=”true”
items-per-page=”numPerPage” class=”pagination-sm”>
</pagination>
</div>
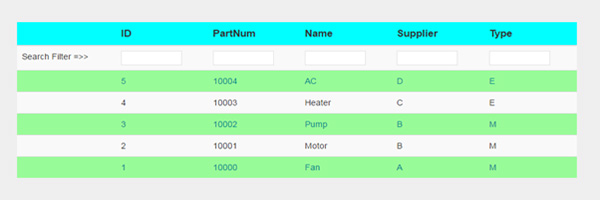
</div>Output screen as shown bellow
Conclusion
This Article is explained about the Rest service JSon data manipulation through AngularJS. AngularJS is the latest scripting framework, which is used to interact with server side data and displayed in UI without any Post back.
This Article contains 4 steps as below
- Read the data from database through Entity Framework
- Returning Json Data from MVC Controller
- AngularJS Service for fetch the JSon data
- AngularJS View for display the results
This post will help you to get basic idea about AngularJS in Asp.net MVC application. Thanks for reading this article.
We hope you have read all the points shared by asp.net development India based experts. If there is anything that is not clear or confusing you, then let us know in the comments.